In the world of photography, small cameras like compact cameras, point-and-shoots, and even smartphones have become powerful tools for capturing impressive photos. While they may lack some of the capabilities of larger, professional DSLR or mirrorless cameras, small cameras offer unique advantages like portability, ease of use, and advanced image quality in a compact form. With the right techniques and settings, small cameras can produce high-quality photos that rival those from larger equipment. Here are the top tips for capturing stunning images with small cameras.
1. Know Your Camera’s Features and Settings
Each small camera has unique features and settings designed to enhance image quality. Familiarizing yourself with your camera’s capabilities allows you to make the most of it.
- Experiment with Different Modes: Many small cameras come with various shooting modes like landscape, portrait, and low-light. Experimenting with these modes helps you adapt your camera settings to different situations.
- Learn to Adjust ISO, Aperture, and Shutter Speed: Many compact cameras and smartphones now allow manual control over these settings. Knowing how to adjust them based on lighting conditions can greatly improve photo quality.
- Enable RAW Format if Possible: If your camera supports it, shooting in RAW format rather than JPEG retains more detail in the image. RAW photos allow for greater flexibility in post-processing, which can improve the final image quality.
2. Focus on Composition
Composition is key to creating visually appealing photos. Small cameras have limitations, so focusing on composition can make a significant difference in the quality of your images.
- Use the Rule of Thirds: Most cameras have a grid overlay feature, which divides the frame into nine equal sections. Positioning your subject along these grid lines, rather than dead center, creates a more balanced and engaging composition.
- Find Leading Lines: Leading lines naturally draw the viewer’s eye through the photo and can add depth to the image. Roads, fences, and pathways make excellent leading lines that guide the viewer to the subject.
- Experiment with Perspective: Small cameras are easy to maneuver, so try shooting from various angles. Shoot from a low angle to make subjects appear larger or capture an overhead view for a unique perspective.
3. Optimize Lighting for Clearer, Sharper Images
Lighting is one of the most crucial aspects of photography, and it can make or break the quality of your photo.
- Take Advantage of Natural Light: Natural light provides a soft, even illumination that enhances photo quality. Early morning or late afternoon (golden hour) offers the best natural light for photography, giving images a warm, flattering glow.
- Use Reflectors and Diffusers: If you’re shooting outdoors, using a small reflector or diffuser can help control harsh sunlight. Reflectors bounce light onto the subject, reducing shadows, while diffusers soften the light, creating a more balanced effect.
- Avoid Digital Zoom in Low Light: Small cameras often lack powerful zoom lenses, and using digital zoom can result in pixelated, noisy images. Instead, get physically closer to the subject to preserve image quality in low-light situations.
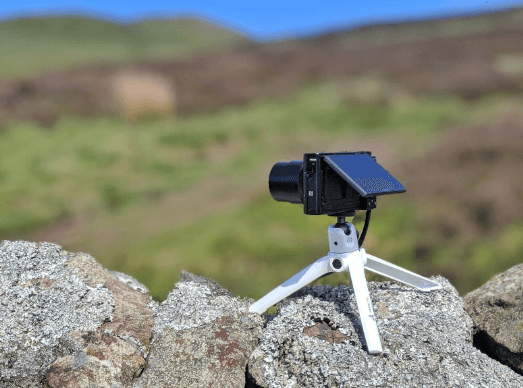
4. Stabilize Your Camera for Sharp Photos
Even the slightest movement can blur a photo, especially in low-light or long-exposure settings. Stabilizing your camera is essential for capturing sharp, high-quality images.
- Use a Mini Tripod: Mini tripods are portable, affordable, and effective for stabilizing your camera. They’re particularly useful for long-exposure shots or self-portraits.
- Enable Image Stabilization: Many small cameras and smartphones come with built-in image stabilization. Activating this feature reduces blur caused by camera shake, especially in low-light conditions.
- Use a Self-Timer or Remote Shutter: Pressing the shutter button can cause slight movements. To avoid this, set a timer or use a remote shutter release to capture the shot without touching the camera.
5. Utilize Depth of Field for Stunning Portraits
The depth of field (DOF) determines how much of the image is in focus and is essential for highlighting subjects in a photo, particularly in portrait photography.
- Use Portrait Mode: Most small cameras have a portrait or aperture-priority mode, which automatically adjusts settings to create a shallow depth of field, blurring the background while keeping the subject in focus.
- Control the Aperture (If Available): If your small camera allows manual adjustments, use a wider aperture (lower f-stop, like f/2.8 or f/4) to achieve a shallower depth of field. This setting makes your subject pop against a beautifully blurred background.
- Get Closer to Your Subject: The closer you are to your subject, the more pronounced the depth-of-field effect becomes, isolating the subject from the background.
6. Make Use of HDR for High-Contrast Scenes
High Dynamic Range (HDR) mode is particularly helpful for small cameras when shooting scenes with a wide range of bright and dark areas.
- Enable HDR Mode: HDR mode takes multiple photos at different exposures and blends them to create a single image with balanced highlights and shadows. This feature is useful for landscape photography or scenes with backlighting.
- Use HDR Sparingly: HDR can enhance details in high-contrast settings, but overusing it can make photos look unnatural. Experiment with HDR in different situations to see where it works best.
- Avoid HDR with Moving Subjects: HDR captures multiple exposures, so if the subject is moving, it can result in ghosting or blurriness. Use HDR only for static scenes.
7. Take Advantage of Built-In Editing Features
Many small cameras and smartphone cameras come with built-in editing tools that can help enhance your images without needing additional software.
- Adjust Brightness and Contrast: Increasing brightness and contrast can make an image look more vibrant. Be cautious not to overdo it, as too much contrast can lose detail in the shadows or highlights.
- Enhance Colors: Some cameras have filters or color enhancement options to make colors pop. Subtle adjustments can add life to a dull photo, especially in landscape shots.
- Use Filters Mindfully: Most cameras offer various filter options. Use them sparingly to maintain a natural look while enhancing mood or tone, such as black and white for a classic feel or warmer tones for evening shots.
8. Experiment with Burst Mode for Action Shots
Capturing fast-moving subjects can be challenging, especially for small cameras. Burst mode is an effective way to capture the best frame in a series of shots.
- Activate Burst Mode: Burst mode takes multiple photos in quick succession, increasing the chances of getting a clear, sharp image in action shots, such as sports events or pet photography.
- Select the Best Shot: After capturing a sequence, review the shots and choose the one with the best clarity and composition.
- Experiment with Different Angles: Try taking burst shots from different angles to capture motion creatively. Experimenting with angles adds a dynamic feel to action shots.
9. Pay Attention to Backgrounds and Surroundings
A cluttered or distracting background can take away from your main subject, especially in small-camera photography, where composition is essential.
- Simplify the Background: Look for clean, uncluttered backgrounds to make your subject stand out. Walls, foliage, or open spaces work well as simple, non-distracting backgrounds.
- Use Foreground Elements: Placing objects like flowers or branches in the foreground can add depth and visual interest to your image, drawing the viewer’s eye toward the main subject.
- Blur Distracting Elements: In portrait mode or with a low aperture, the background can blur, creating a soft bokeh effect that keeps the focus on your subject.
10. Practice Patience and Take Multiple Shots
Sometimes, achieving the perfect photo requires a bit of patience and persistence.
- Take Multiple Shots: Don’t settle for just one photo. Take several shots from different angles and with varied settings. This increases the likelihood of getting a shot that’s sharp, well-composed, and perfectly exposed.
- Practice in Different Settings: Experiment with your camera in various lighting conditions, locations, and subject types. Practicing helps you understand your camera’s strengths and limitations, making it easier to capture high-quality images in different environments.
- Review and Learn: After each session, review your photos to see what worked and what didn’t. Learning from each photo helps you continually improve your technique.
Conclusion
Capturing high-quality photos with a small camera is about understanding the features of your device, experimenting with composition, and optimizing lighting and settings to suit your scene. By practicing these techniques and paying attention to details like stability, backgrounds, and depth of field, you can consistently produce stunning images, regardless of the size of your camera. With these top tips, your compact or smartphone camera can become a powerful tool for creating professional-level photos.